Royalty-Free Music: Tips and Tutorials3/23/2021 A lot of people have been asking questions related to the legal side of royalty free music. Many have asked whether or not royalty free music is also copyright free. We want to explain in further detail the difference between royalty-free and copyrighted music, in order to help our subscribers and potential customers make the distinction between legal practices and copyright infringement within the music licensing field. Royalty Free vs Copyright So what makes royalty-free music “royalty-free?” Royalty free means that someone who purchases a license for a musical work does not need to own the copyright or pay royalties each time the licensee wants to use that musical work. Copyright free, on the other hand, means that the copyright for that musical work has expired and is therefore in the public domain. What Is A Royalty? A royalty is a monetary request payment made from the copyright holder each time a musical work is used. A royalty is negotiated by the copyright holder, however the ownership of the master recording of a musical work always stays in the hands of the artist or publishing company. In all cases, individuals are able to use the musical work they paid for without changing or modifying the works. Once again, royalty free means that the licensee does not need to pay or negotiate further payments to use the work, but this does not mean that they own the copyright to the work. In order to obtain a royalty free license, they need to subscribe to a music library such as MusMe. While royalty free music is meant to allow content creators to be able to monetize their work on digital platforms like YouTube, they CANNOT claim ownership of the musical work or resell, trade, or exploit for profit to other licensees or companies such as ad agencies for commercial purposes. If the licensee would like to use their work for that purpose, they can obtain from us a different type of sync license agreement.
2 Comments
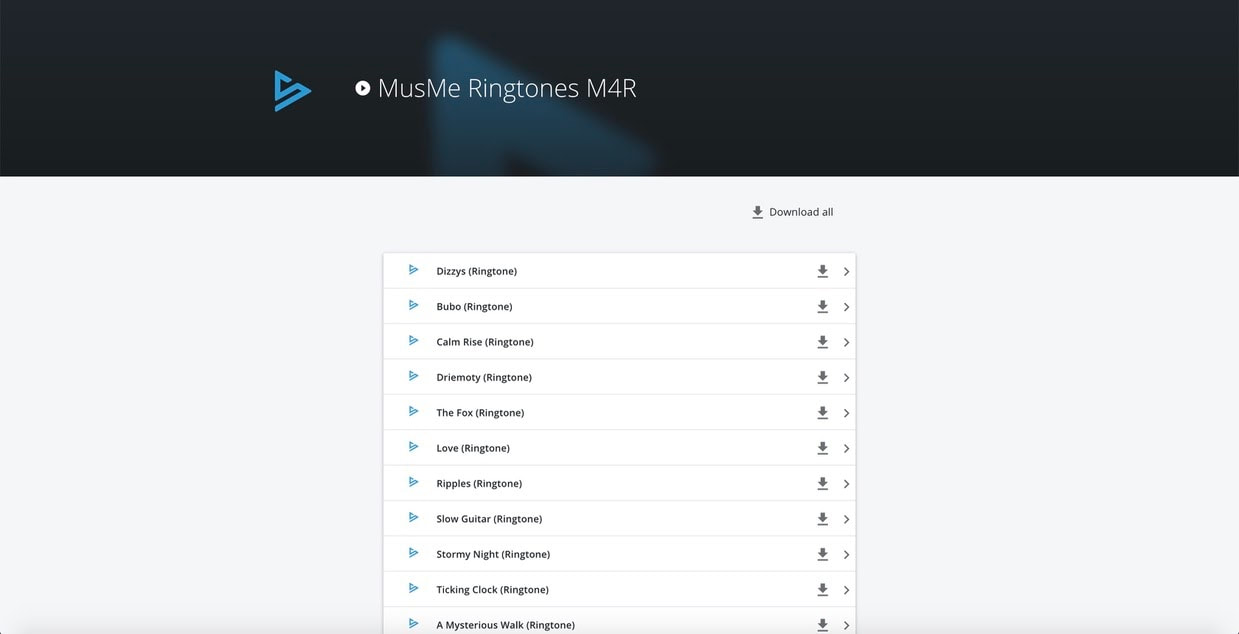
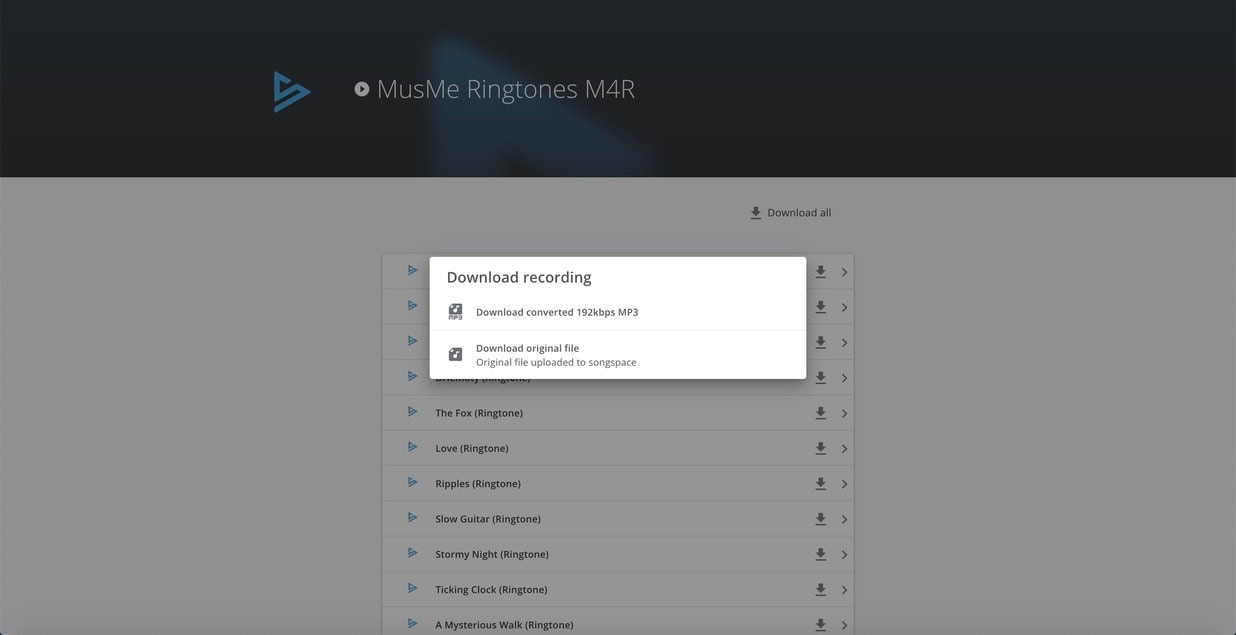
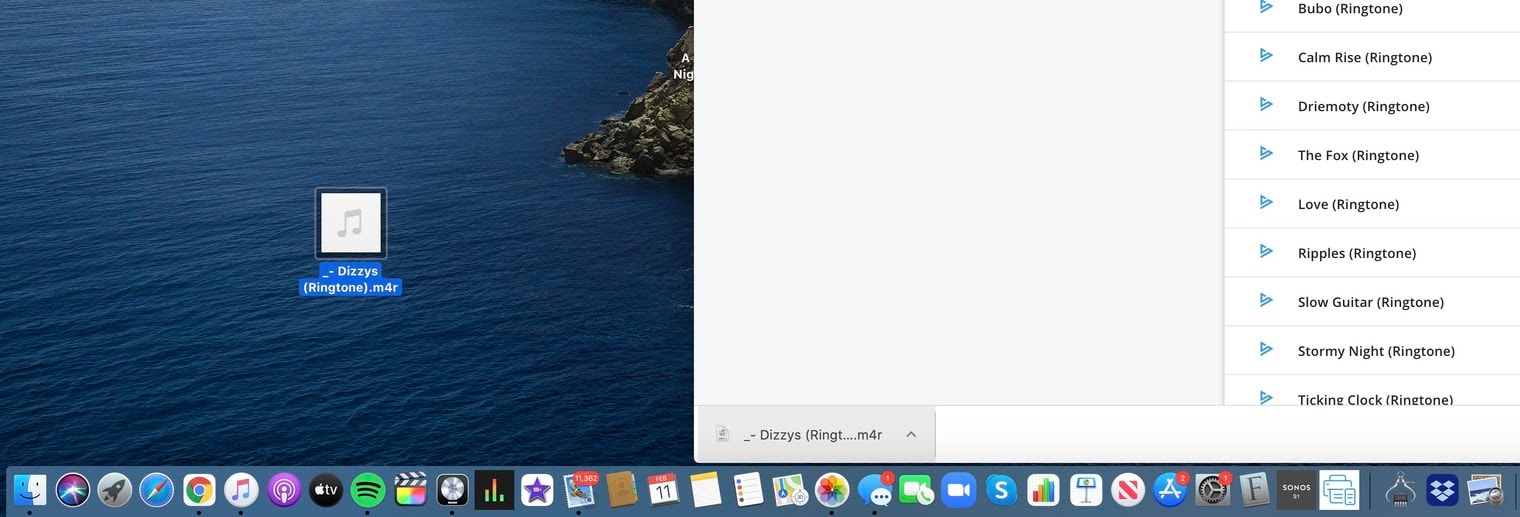
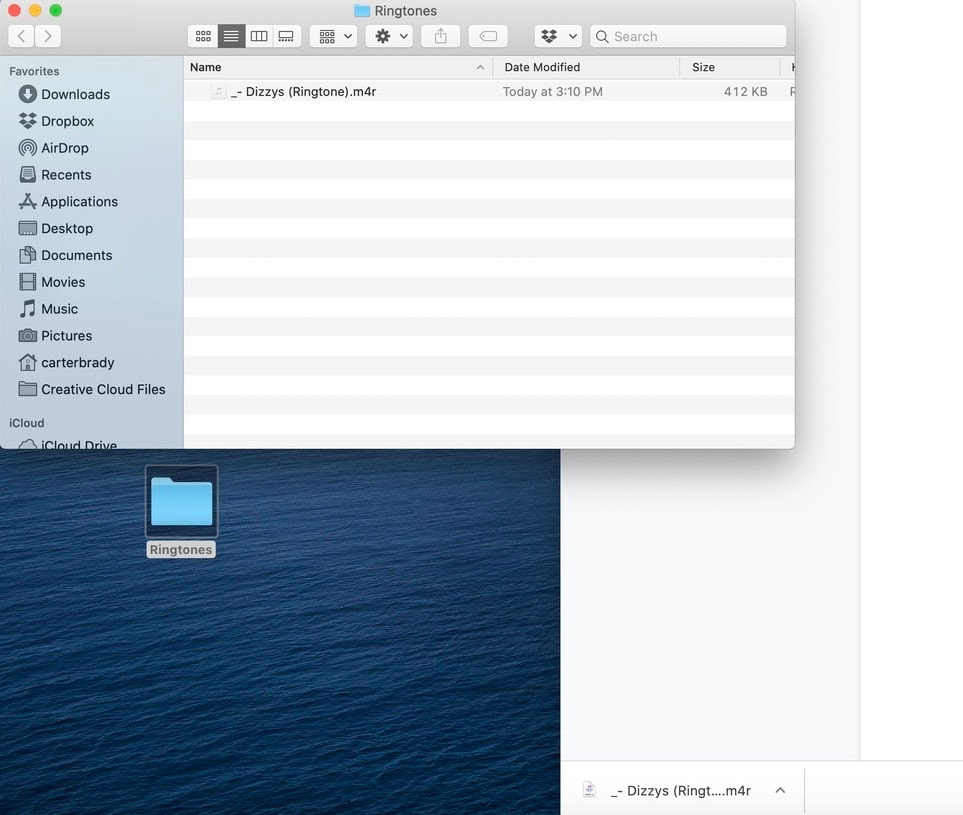
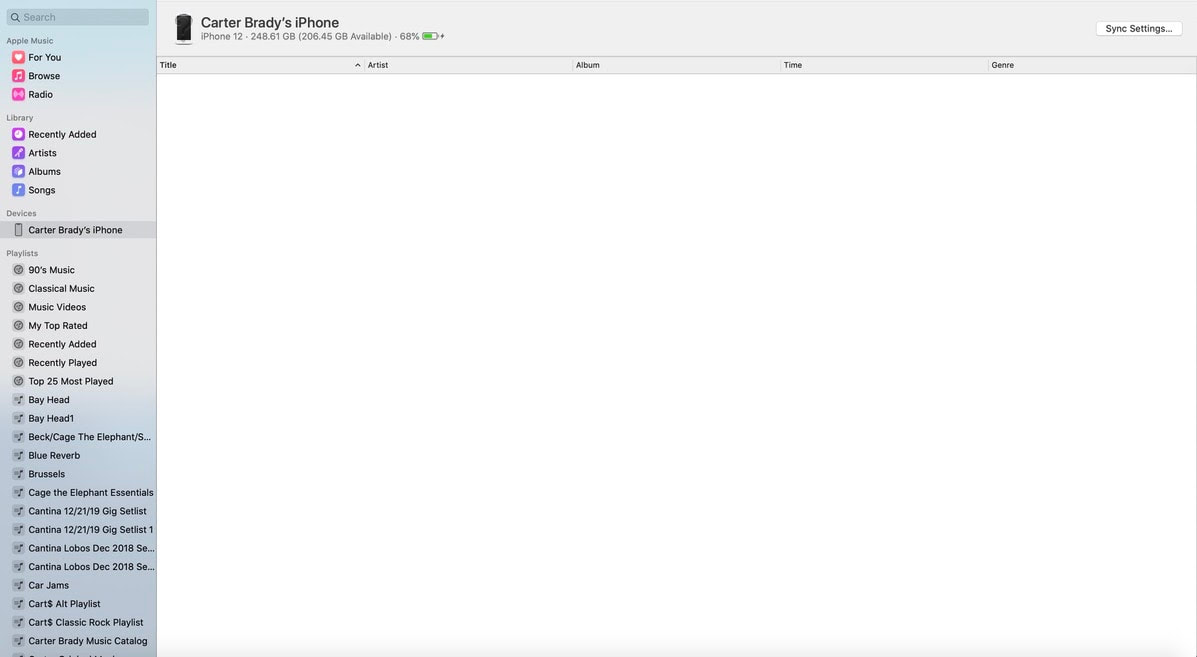
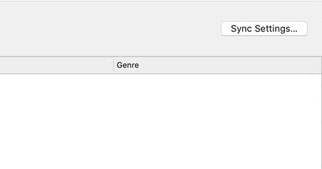
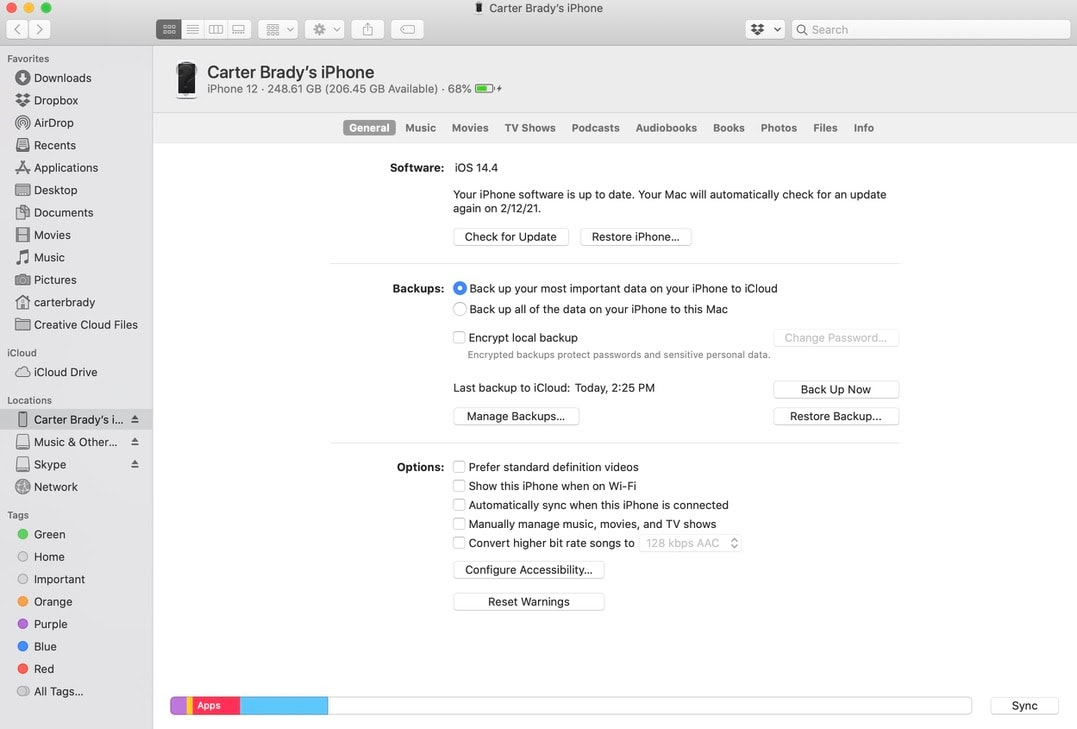
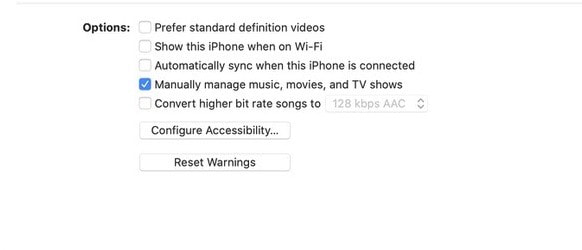
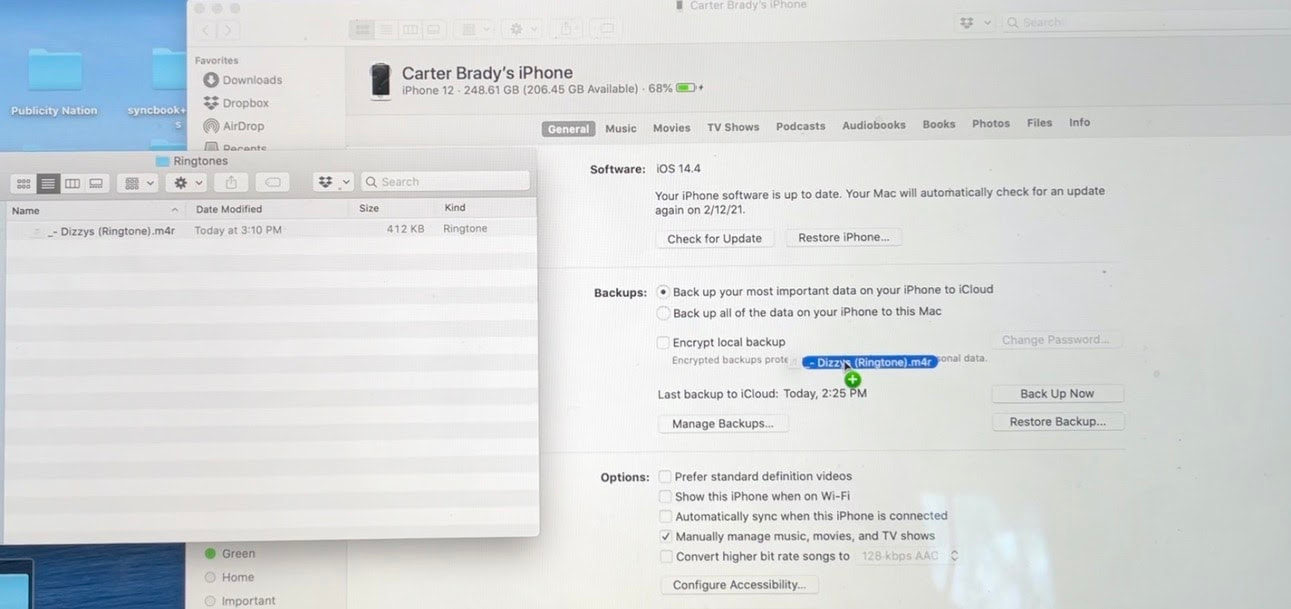
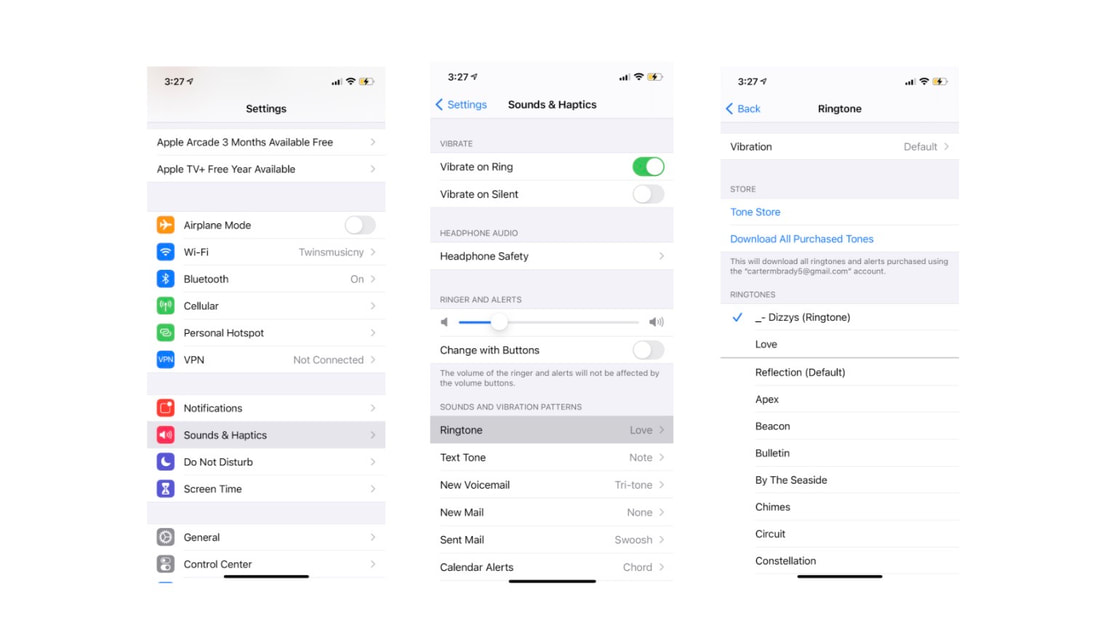
Hi MusMe Subscribers, While sending you the ringtones is part of the process, we want to make sure that getting your new MusMe ringtones on your phone so they are ready to use is as easy and straightforward as we can make it. We decided to lay out a detailed step-by-step process on how to download and implement our ringtones onto your iPhone so you can start using them. Step 1: Starting on your computer, click on the link you received with your subscription, or download the ringtones you bought on our store. Step 2: In the link received you can Select the ringtone that you would like to use and click the Arrow icon to the right of the ringtone file. This will take you to a screen that gives you the option to download your ringtone. Make sure to select “Download original file.” Each of these ringtone files are already in M4R format, the necessary format in order for the ringtone to be able to sync to your iPhone. Step 3: Once downloaded, you should soon see the ringtone file pop up under “Downloads” on your computer. Once you identify where the file is, drag the file into your screensaver region known as “Desktop.” We advise that you create a folder on your computer titled “Ringtones” so that every month you can fill it with our new ringtones. Step 4: Open your Music Application on your computer, and then, using a lightning-to-USB adapter, plug your iPhone into your computer. Once your iPhone shows up on the left-hand side of your music library, click on that. Step 5: Once there, click on the “Sync Settings'' icon in the top right corner of the page. This will take you to a new page. Then click on the “General” icon in the menu bar. There should be a check box that’s labeled “Manually manage music, movies, and TV shows.” Make sure that box is checked off, and that the “Automatically sync when this iPhone is connected” box is unchecked. Step 6: Drag the ringtone into the general field of the iPhone sync page, which will show up with a green "+" icon next to the file before releasing the mouse. This will place your new ringtone onto your iPhone. Step 7: Lastly, open your phone and go to “Settings,” then go to “Sounds and Haptics” where you will see a place that says “Ringtones.” Once you click on that, you should then be able to see your recently imported ringtone at the very top of the page, along with the rest of the Apple default ringtones. You can then repeat these steps for the next set of ringtones you decide to import. We hope that the short tutorial is helpful and contact us with any further questions.
All the best, Carter Brady Marketing Assistant, TwinsMusic Enterprises cartermbrady@twinsmusicny.info Twinsmusicny.com Introduction6/30/2020 Hi Everyone!
My name is Carter Brady and I am a recent member of the marketing and editorial team at TwinsMusic. I am happy to share with you that we are very excited to be offering Virtual Study Sessions for local student musicians interested in continuing to practice and perfect their skills over the summer. We are very flexible and would love to hear from the teachers and students as to what times would be most convenient for them. Please feel free to share your schedules in the comment section below by replying to this blog post. Thanks in advance for your cooperation and we are looking forward to working with you all! All the best, Carter Brady Marketing Associate, TwinsMusic Enterprises twinsmusicny@yahoo.com Canceled Workshops - Plans Going ForwardAlthough our summer workshops have been rescheduled for later dates, we would love to hear from you what times you would be available for VIRTUAL STUDY SESSIONS with our staff members. Let us Know! Archives
March 2021
Categories |




 RSS Feed